Intro
This post shows how to set up a web sockets project in Go. I will be using golang.org/x/net. This
package is part of the extended standard library, so it is maintained by the Go team. I followed this same
template for one of my recent projects - Yacht Dice.
The rest of this article is a step-by-step explanation this template. To skip ahead to the end result, take a look at the repo.
To see my project that makes use of this template, see yacht-dice-service.
Basic WebSockets
To start, get the websocket package.
$ go get golang.org/x/net/websocket$ go mod tidy
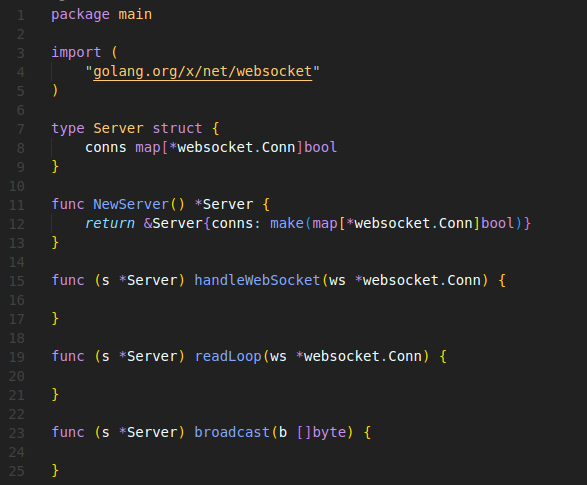
Create files main.go and server.go. In server.go, add the following skeleton code.
This contains the Server struct and a few methods. handleWebSocket will handle incoming web socket connections
and add them to our list of known connections. readLoop will constantly check for new messages sent by
any clients. broadcast will send messages to clients.
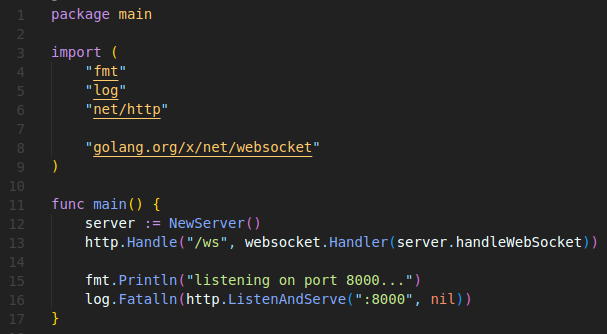
In main.go, I just have the main method which sets up the web server.
Now we can start implementing the methods in server.go. First, I'll set up handleWebSocket since this
is sort of the "entry point" into a web socket connection. In this first pass, all I'm going to do is print out where the connection
is coming from, add it to the conns map and kick off the read loop for that connection.

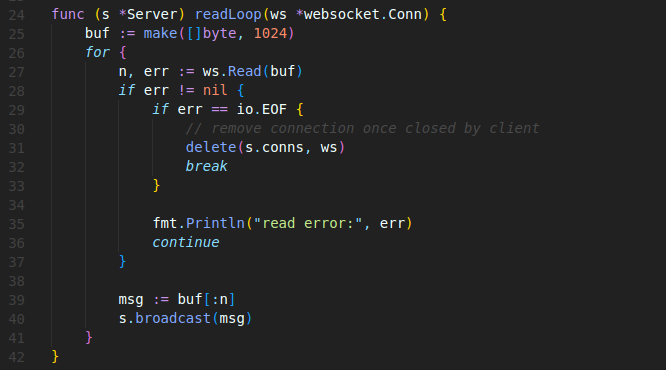
The read loop is going to constantly check for messages from the client and decide what to do with it. I set the buffer size to 1024,
but this value can be changed depending on expected message size. Then it goes into a loop where it tries to read a message
from the connection. If it encounters an EOF (i.e. the client disconnected), the connection gets removed from the conns
map. Any other errors and it will just continue. If it was able to read a message, it's going to broadcast it back to
the clients for now.
Finally, the broadcast method will send a message to every client (each entry in the conns map). A
goroutine is used here because we don't seen to wait for it to finish sending the message before moving on to the next client.

At this point, we should have a functioning server which clients can connect to and send/receive messages. The easiest way to open a couple browser windows and connect from the console.
Run the server
$ go run .
In each browser window, open the console and create a WebSocket connection.
let ws = new WebSocket('ws://localhost:8000/ws');
Then set the onnmessage function to print out anything received from the server.
ws.onmessage=(event) => {console.log(event.data)}
Now messages can be sent with ws.send('message'). When a message is sent from any client, all clients
will receive the message and print it out. In the image below, notice the client on the left send 'hello' and both
clients received the message and displayed it.

Adding functionality
This is a decent starter template so far, but one more thing I'm going to add to this template is the concept of rooms. This is a common thing for WebSockets since usually clients will want to interact with a handful of people in a virtual room, rather than everyone who's currently using the site.
Adding the concept of rooms only requires some small modifications to the code that has been written so far. The first change is to update the main method so that the route has a "/" on the end. I chose to implement this so that the room clients are attempting to join is part of the URL (e.g. /ws/room_id). Adding the slash allows the handler to match URLs with something after the "/ws".

The Server connections kept track of by the server need to be wrapped in another map where each key is a room ID.

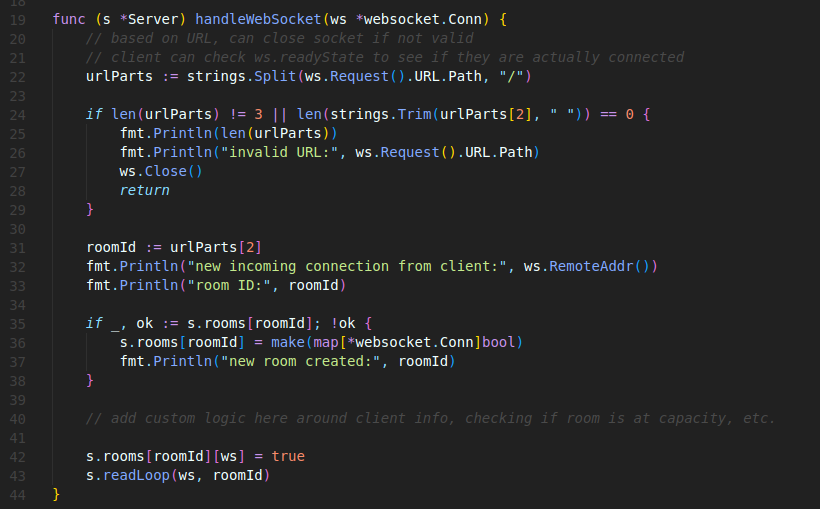
The handleWebSocket method will now parse the URL to get the room ID. After getting it from
the URL, this is where custom logic can be added to check if the room is full, keep track of additional
info about the connection, etc. It will also pass the room ID to readLoop.
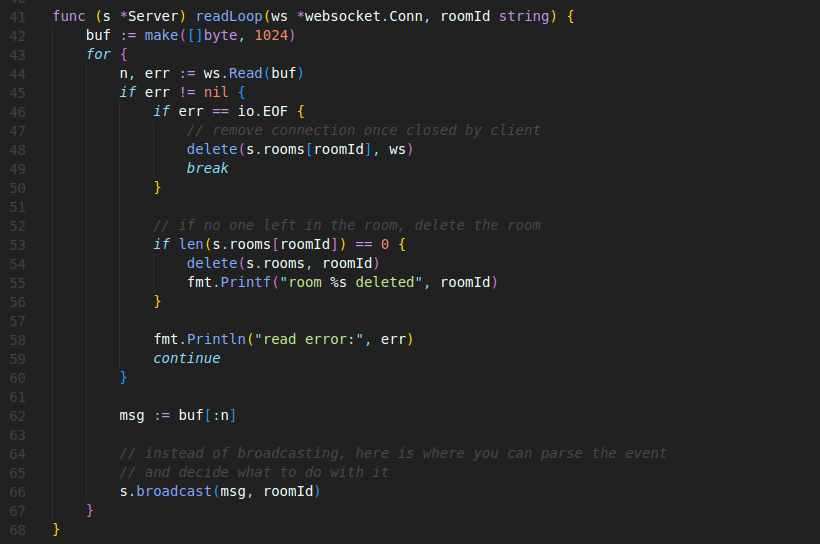
The main change to readLoop is that now it will check if a room is empty and delete it from the
map if it is. Also note that we don't have to broadcast a message here. This is where we might want to
parse the message and decide what to do.
Finally, broadcast is updated so that instead of sending a message to all clients, it
accepts a room ID and will only send a message to the clients in that room.

For the final test, WebSocket connections can be created in two browser windows the same as before, but include a room ID in the URL. When both clients are in the same room, they both get the message. The client on the left leaves room1 and joins room2. When they do that and send another message, the client on the right does not see it.
