Foreword
This post is targeted at people of all skill levels. I tried to go into as much detail as possible, but if you have any questions along the way, please reach out to me at markus@markushutnik.com and I will be happy to help.
What you will need
To create a website, you will need to write code. This is different than programming (I will explain the difference later in this post). To write code, you need a text editor. Regardless of your operating system, you should already have a text editor available to you (e.g. Vim on Linux, TextEdit on Mac, Notepad on Windows). While these will work, I highly recommend installing Visual Studio Code. Visual Studio Code is a free application that is purpose-built for writing code. It will allow you to use a text editor, file browser and terminal all in the same application. I will also be using Visual Studio Code throughout this tutorial.
There are many options available for hosting a website. My preferred method is through GitHub. The advantage of using GitHub is twofold. For one, it provides a central repository for you to store your code, so you can access your code from anywhere. Additionally, GitHub has free website hosting. GitHub can take your code and deploy it as a website very easily, and I will walk through how to do that in this post. You will need to create a GitHub account. Go to https://github.com/signup and follow the instructions.
Finally, you will need git. This is a version control software and it is how you will push code from your computer to a GitHub repository. Version control systems like git allow you to track changes to your code over time. This is helpful because even if you mess up your code, it allows you to revert to a previous version. To distinguish between git and GitHub, just know that git is a piece of software on your computer, and can be used completely independently of GitHub. It is the "brains" which tracks the changes to your code. GitHub is a remote location for you to store your code in a centralized location, and it is the mechanism through which we can publish our website. If you are using Linux or Mac, git is already available to you since it comes pre-installed on the operating system. If you are using Windows, you can install git from their website.
Intro to HTML
Every website you visit is made up of HTML. HTML stands for HyperText Markup Language. HTML is a markup language, but it is not a programming language. The difference is that HTML is declaritive. That means that when we write HTML code, we are describing what we want our end result to look like, but we're not telling the computer how to do it. You can think of a programming language as instructions for the computer for exactly what it should it do. With HTML, we describe what we want and our browser figures out how to do it.
Browsers are very complex pieces of software that do a lot. One of the most important jobs of internet browsers is to "render" HTML. When you go to a website, your browser sends a request to that website's server. Your browser receives an HTML document which it renders as the content you see on your screen. If you're curious, you can right click on a page you're viewing in your browser and then click "View page source" to see the code that makes up the web page you're viewing.
HTML has a set of rules or "syntax" on how we describe what we want. It uses something called tags for describing how we want text to be rendered
in a browser. Usually we have an opening tag, followed by our content, followed by a closing tag. As an example, if we want bold text, we can use the "b" tag:
<b>some text</b>. This is the general format of tags. We have diamond braces with the tag name (in this case, "b")
as the opening tag. The closing tag is the same thing, but with a "/" before the tag name. I'll show a handful of commonly used tags in this
tutorial, but you can explore more tags available here (Mozilla's documentation).
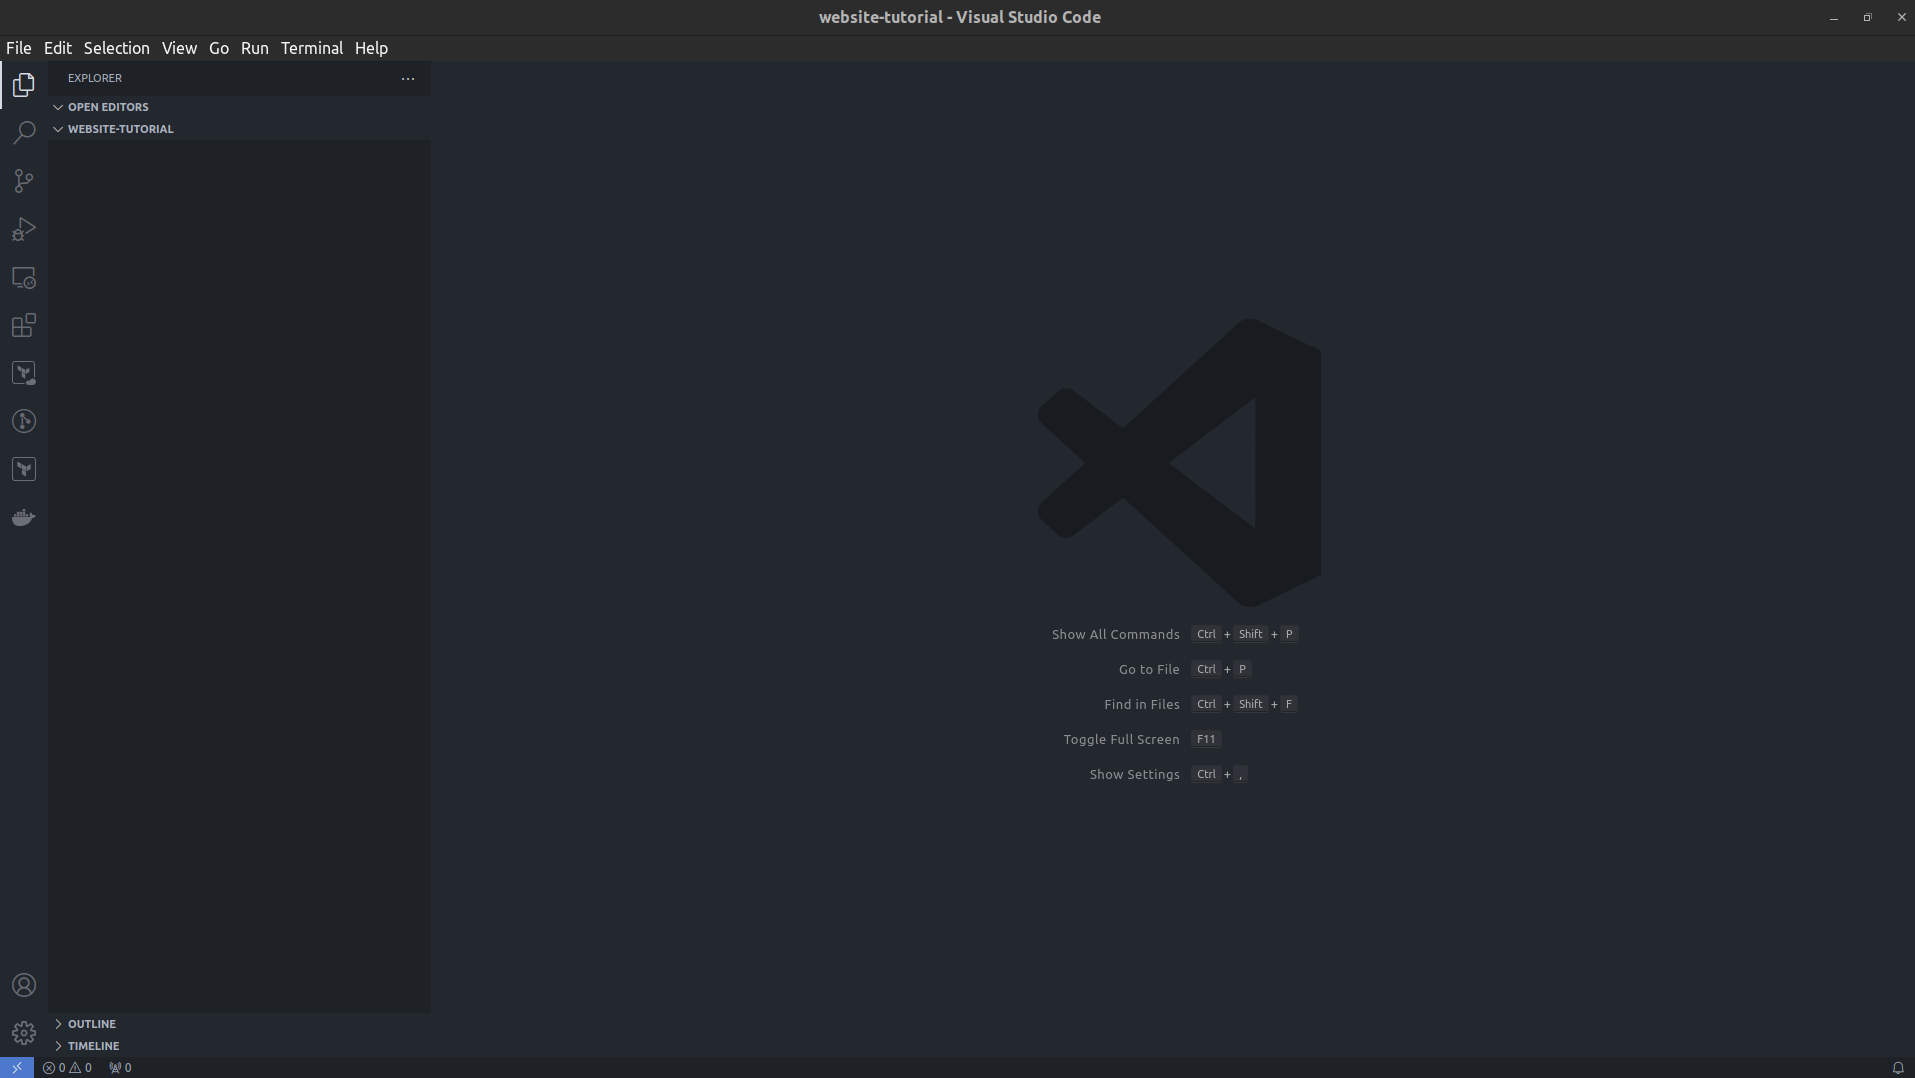
Let's write a bit of HTML to help understand this better. Create a new folder somewhere on your computer and name it whatever you want. You can create this folder on your desktop or somewhere in your home directory, just make sure you know where to find it. Now open up Visual Studio Code. In the top left of the window, go to File > Open Folder and select the new folder you just created. You should see something like this in Visual Studio Code now.
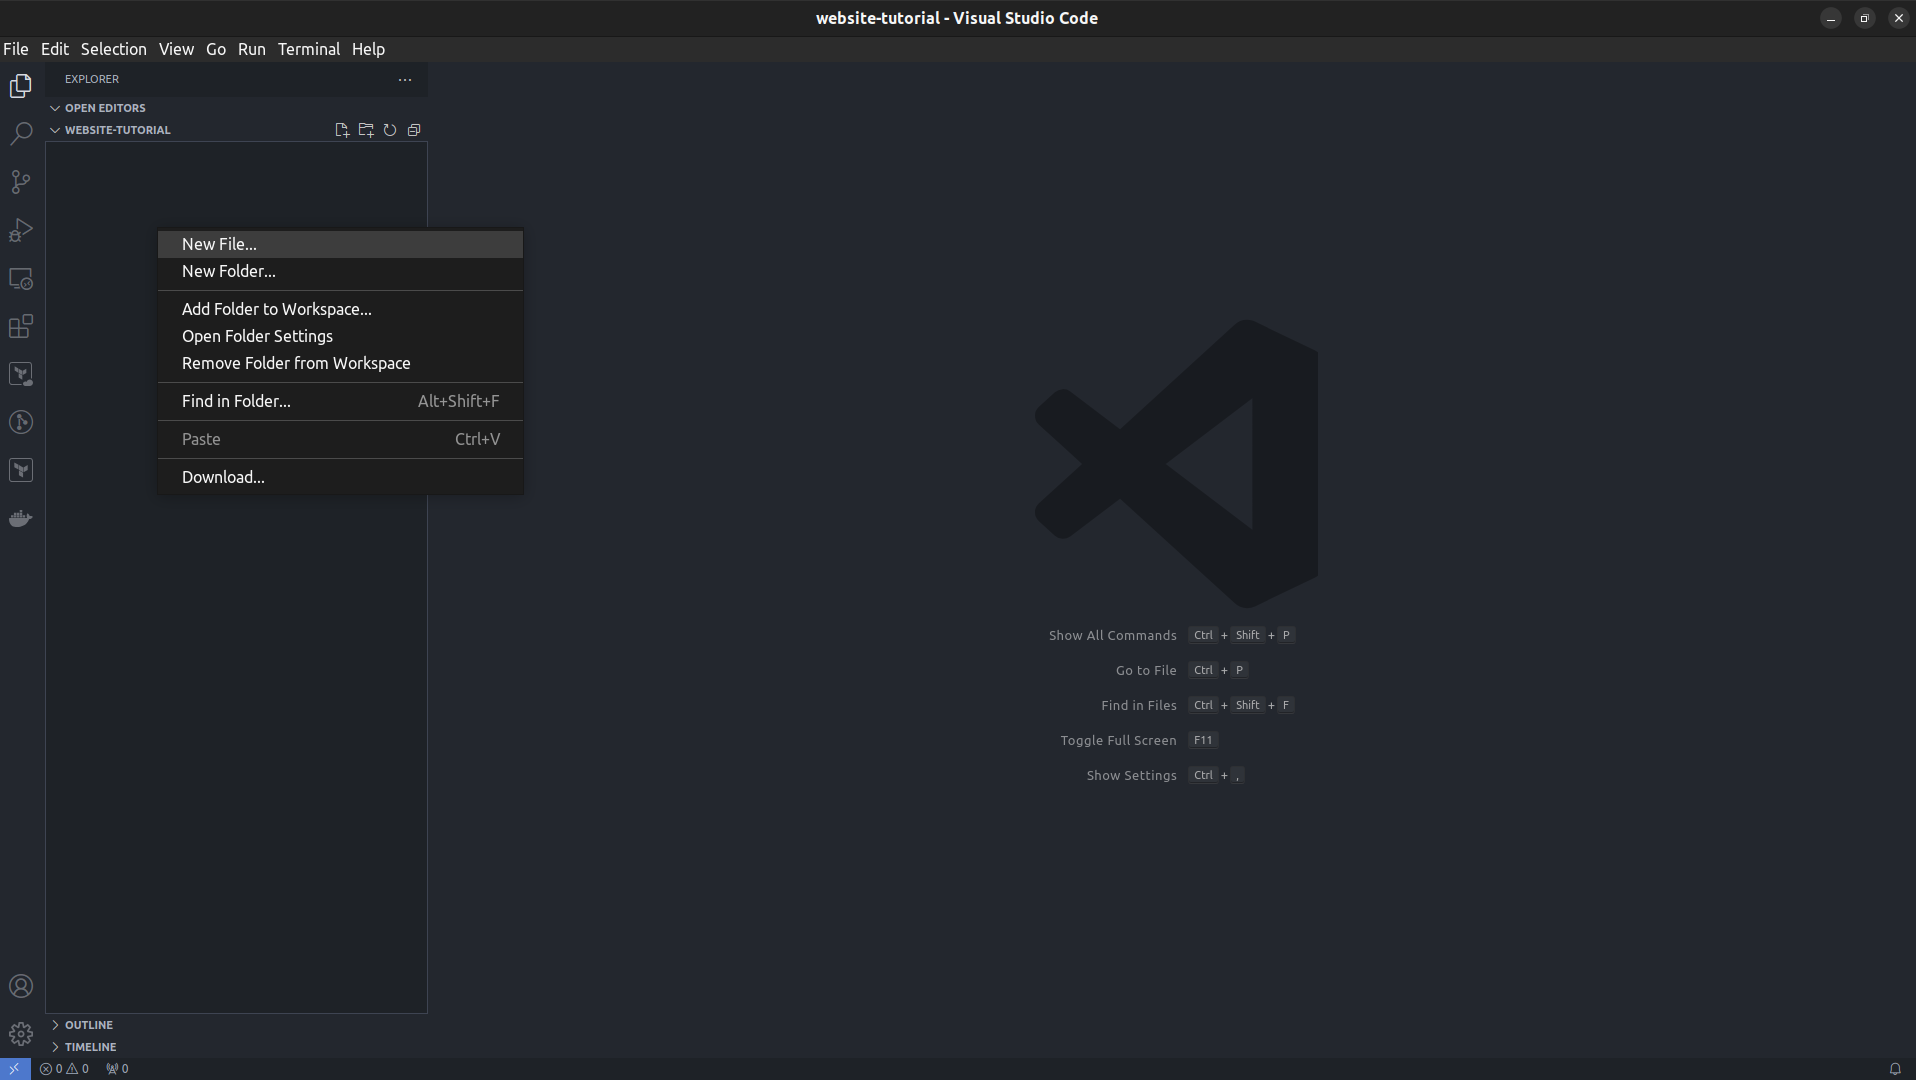
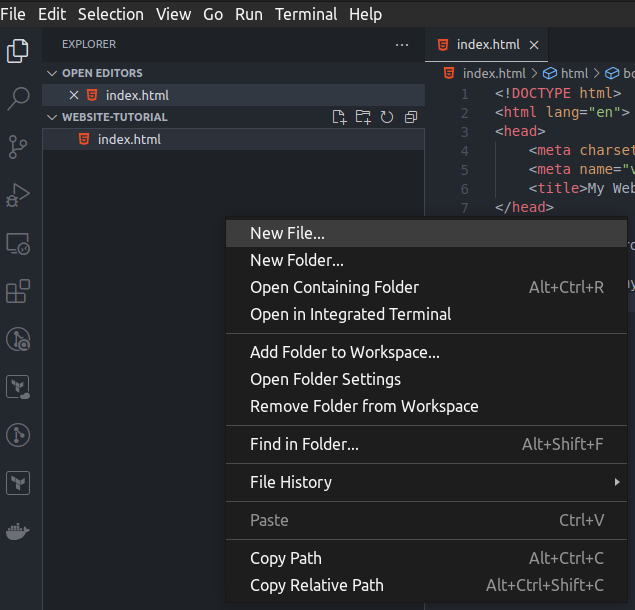
Now right click on the left area and choose "New File". Then type "index.html" and hit enter.
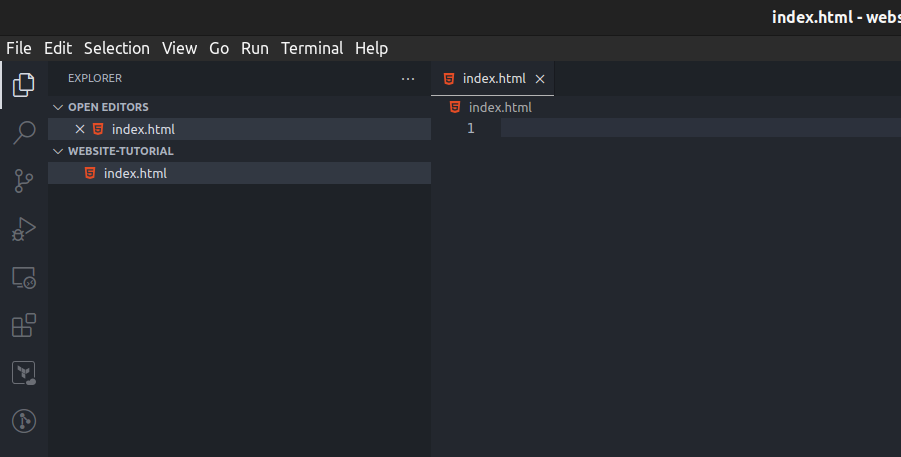
Now you have this blank index.html file open in the editor.
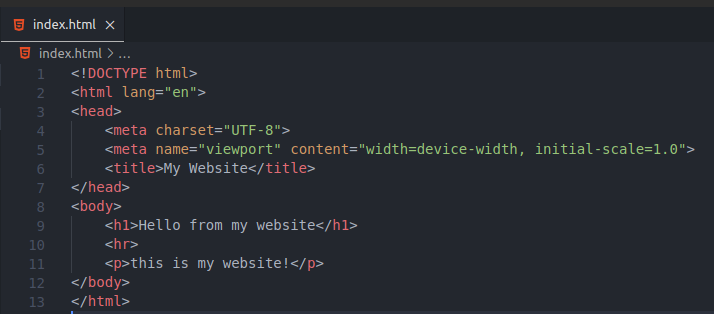
Below is some boilerplate HTML. Every page you write will follow this same general structure. To break this down, we have the
<!DOCTYPE html> to declare the document as an HTML document. Below this, we have an html tag
which all of our content is in. The head tag defines metadata about our document. Most notably, the title
tag defines what text shows up in the tab title. The body tag is the content of our web page. h1 is heading 1,
which is essentially large text. We could also use h2, h3, h4, h5 and h6, with h6 being the smallest. The hr tag is a horizontal
rule, which is a just a line across the screen. The hr tag is an example of a tag that doesn't require and opening and closing.
Another example of this is the br tag, which is used to start a new line of text.
The p tag is a paragraph. This is normal sized text with some spacing below the text.
<!DOCTYPE html>
<html lang="en">
<head>
    <meta charset="UTF-8">
    <meta name="viewport" content="width=device-width, initial-scale=1.0">
    <title>My Website</title>
</head>
<body>
    <h1>Hello from my website</h1>
    <hr>
    <p>this is my website!</p>
</body>
</html>
Paste the boilerplate from above into your index.html file and press ctrl+s on your keyboard or go to File > Save to save the file.
Now that we have an HTML file, it can be opened using a browser to see how this code gets rendered. Browsers are usually used to render HTML files from websites we are visiting, but they can also open HTML files that we have saved on our own computers. Right click on the index.html file in Visual Studio Code and click "Open Containing Folder". If you're on Windows, this may say something like "Reveal in File Explorer".
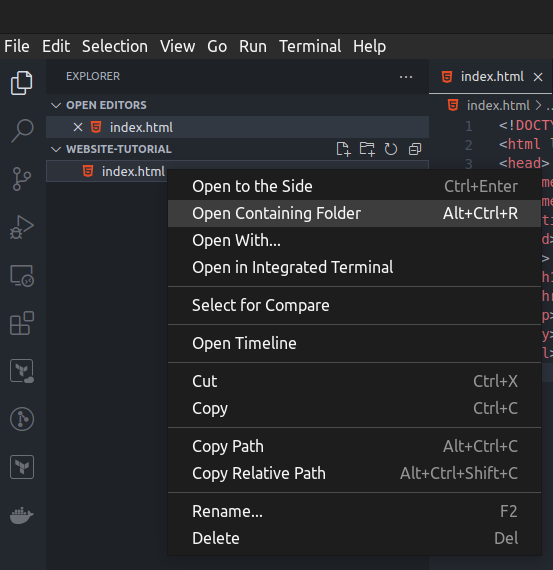
This will open up a new Window. Double click on the HTML file and it will open up in your browser. Now you can see how the browser rendered your code. If double clicking the file doesn't open it in your browser, notice in the screenshot below that you can also paste the full path to the file in your browser's URL area to open the file. The full path to the file can also be obtained in VS Code by right clicking on the file like the screenshot above, and choosing "Copy Path".

Deploy the website
So far, we have created an HTML file that we can view in a browser, but now we want to share it with others as a website. We can take this single HTML file and publish it as a website. We will come back and add more to this, but this is a good time to get the "hard" part of publishing the web site out of the way.
First, create a new repository in GitHub. Make sure you're logged in on github.com and click the "+" button near the top right. Choose "New repository".
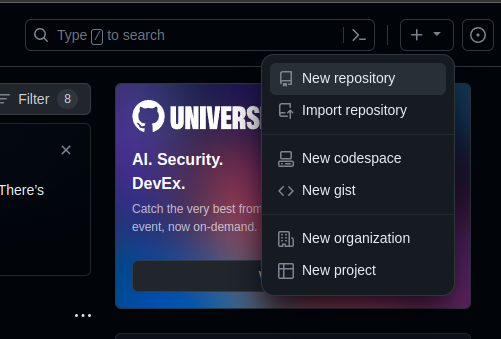
Enter a name for your repository. Make the name short and descriptive. Keep it as a "Public" repository. This means that anyone can view the code you have published on GitHub. For a website like this, there is actually no point in making it private due to the nature of the web. As I showed earlier, you can view the raw HTML of any website you are on. So even if you made this a private repository, people could still view the code in their browser. Also, you can only use GitHub's website hosting on public repositories if you are using a free account like we are. Make sure you have "Public" selected, then click "Create repository".
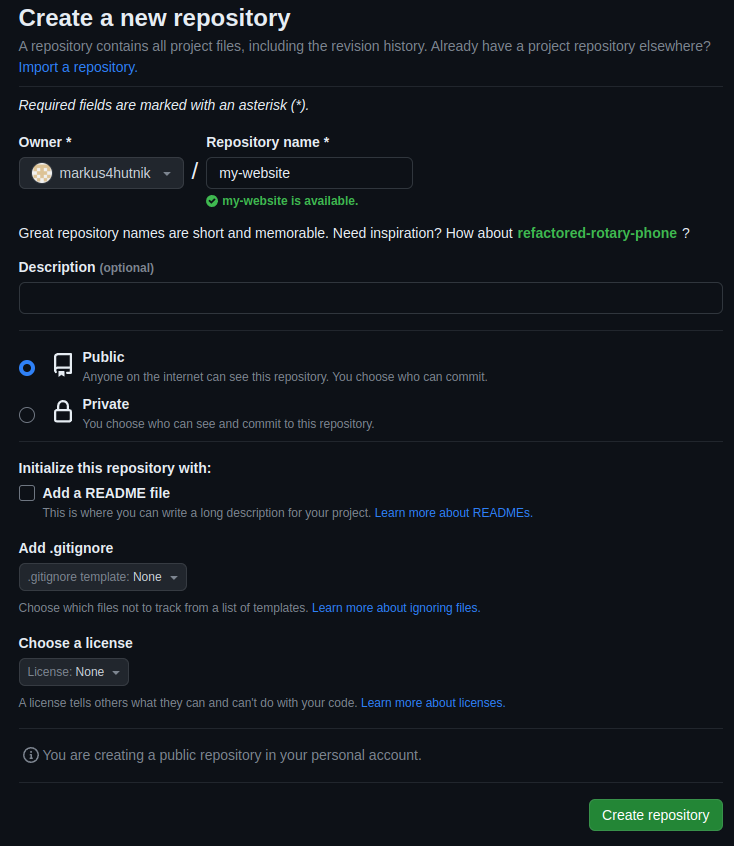
After creating the repository, keep that page open. We will need to come back to it shortly. For now, go back to Visual Studio Code and press "Ctrl+Shift+`" or go to Terminal > New Terminal to open a terminal session.
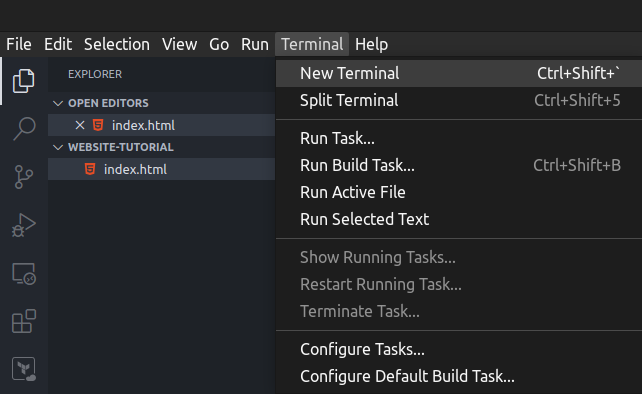
Now you'll see this new section At the bottom of Visual Studio Code.
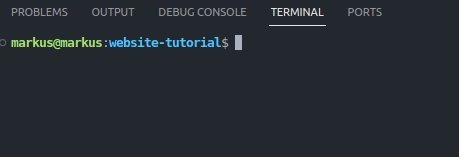
Now I'm going to go over some git commands you will need to run in this terminal. It's okay if these don't completely make sense at the moment. Git is a widely used tool and you can read up on it more later. For now, I'll just go over the commands you need to get your code onto GitHub.
In the terminal in Visual Studio Code, type git init and hit enter. This will initialize a git repository
in this folder on your computer.
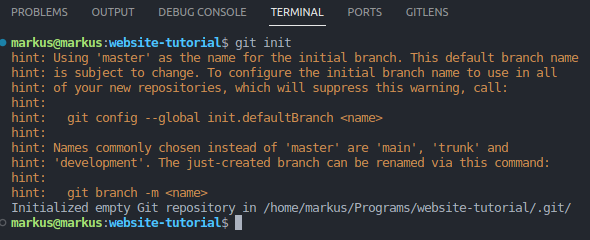
Now type git checkout -b main. This will create a "branch" on your computer named main to match up with the name of
the branch in the GitHub repository you created. We don't need to worry too much about the concept of branches for now, but
again this is something you can read up about online if you are curious.

Copy the URL from the repository you created in GitHub.

In the terminal, type git remote add origin <repo URL>, replacing <repo URL> with the URL you copied in the
last step. Then hit enter. This will tell your local git what the "origin" is (i.e. the remote GitHub repository).
Then type git add . and hit enter to stage your changes. This tells git which files you intend to track. Using "." in this command
tells it to stage all the files.
Run git commit -m 'initial' to commit the changes. This is our first commit that git will track. The "initial" is the commit
message. As we go forward, we will use more meaningful commit messages to denote exactly what changed in each commit.
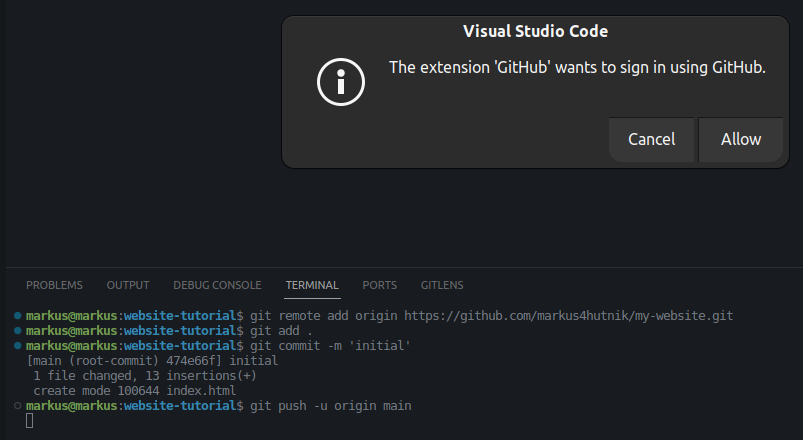
Finally, run git push -u origin main to push the code to GitHub. Now you will be prompted to authenticate with GitHub.
Follow the prompts on the screen to complete the process.
Click "Allow"
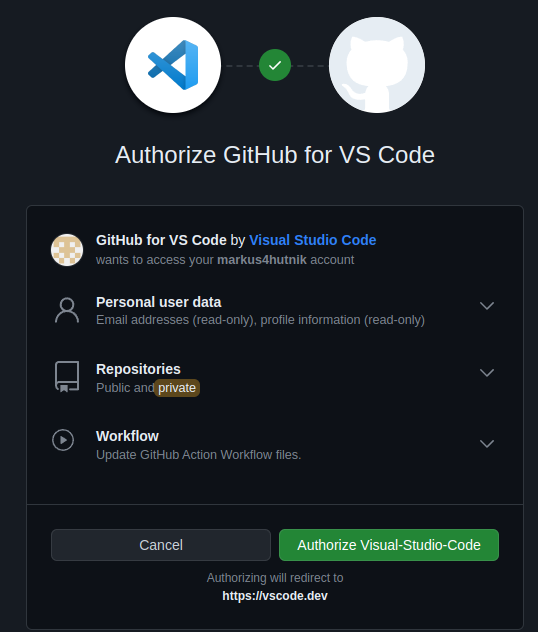
Click "Authorize Visual-Studio-Code"
Now go back to your GitHub page (where you copied the repository URL from) and refresh the page. You should see your index.html file there.

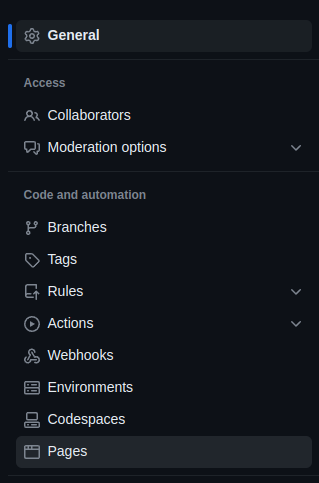
Click the "Settings" tab on the far right in your repository

Navigate to the "Pages" section
Under "Build and deployment" and "Branch", select the dropdown shown below and choose "main".
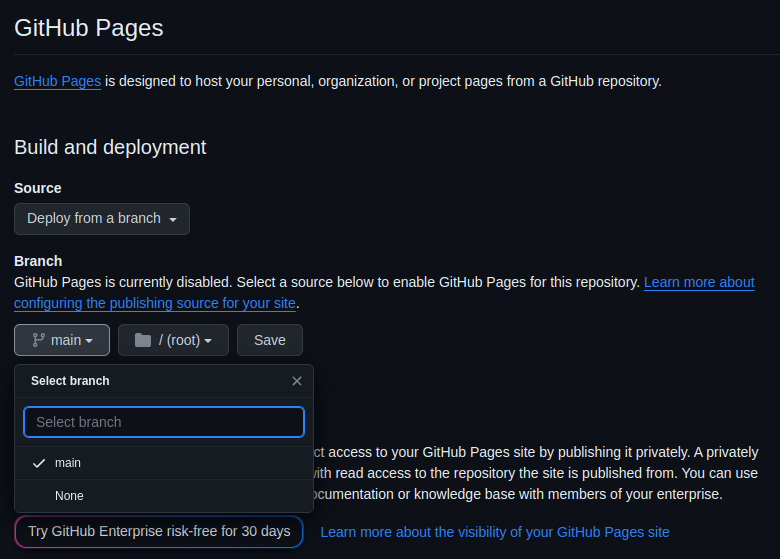
Click the "Save" button.

Now go to the "Actions" tab and wait 2-3 minutes. Once the workflow run turns to a green checkmark shown below, your website will be available.
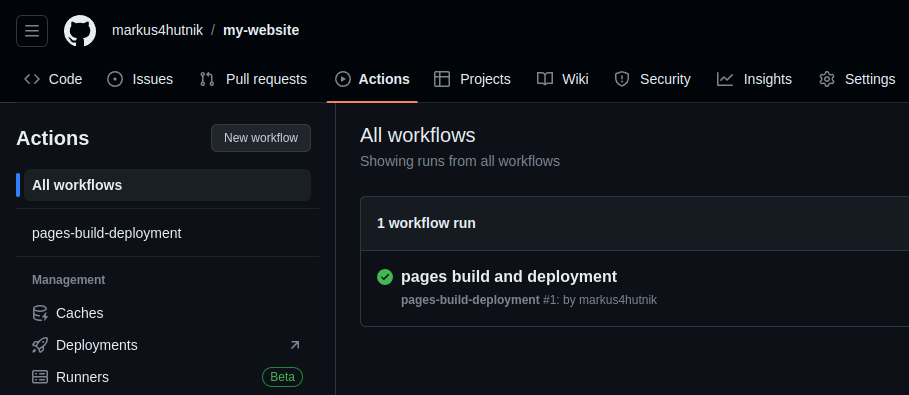
You now have a publicly available website with the URL "https://<your username>.github.io/<your repository name>". For example, my username was "markus4hutnik" and my repository name was "my-website". So my URL is "https://markus4hutnik.github.io/my-website/".
Congratulations! You now have your own website on the internet!
If any of that did not work for you, reach out to me at markus@markushutnikcom and I can help. If you're new to git and GitHub, then that was probably a lot of info to take in all at once, and that's fine. Just keep following along and you can learn more about these tools as you progress. The good news is that most of what we just did was a one-time setup. Now updating the website will be easy.
Making changes to the site
Let's add another page to the website. In Visual Studio Code, do the same thing as we did before and right click in the left pane and select "New File". Then type "posts.html" and hit enter.
One advantage of using Visual Studio Code over your default text editor is that it can generate boilerplate code for us. In the new file, type "!" and hit enter.
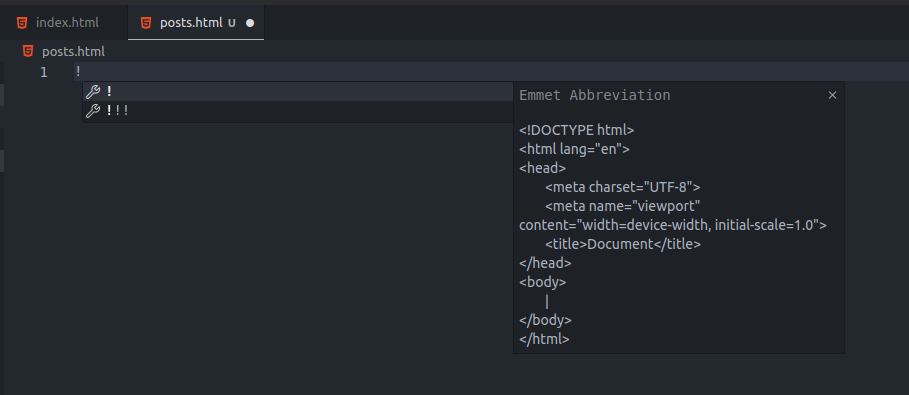
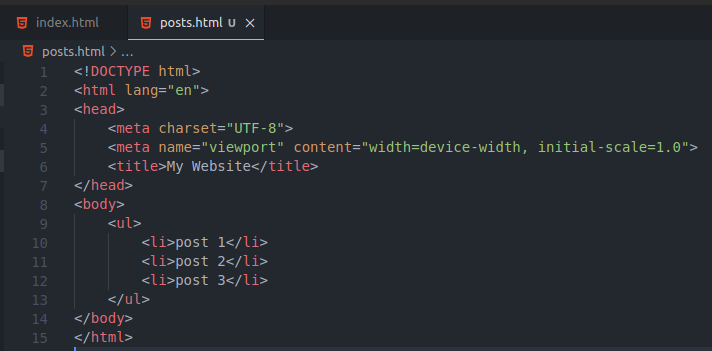
For consistency, let's make the title match our index.html so the title of the tab is the same no matter what page
the user is on. Also add the following content inside the body tags. The ul tag stands for
"unordered list". This will render as a bulleted list. Each li tag within the list is a "list item".
We could also use the ol tag for "ordered list". This would make each list item have a number next to
it instead of a bullet.
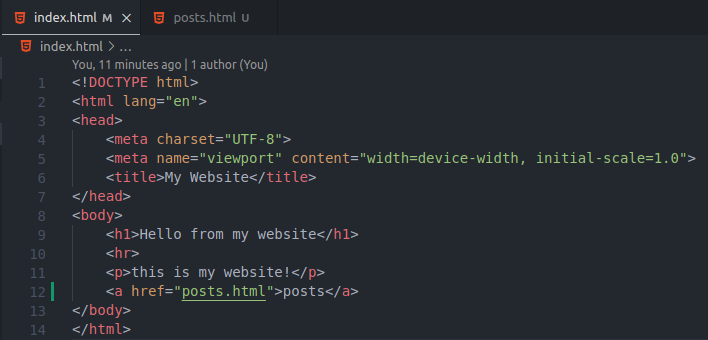
Open index.html again by clicking on the index.html tab in Visual Studio Code or double clicking on index.html in the
pane on the left side. Add <a href="posts.html">posts</a> after the paragraph tag. The a
tag is used for hyperlinks. This can be used to link to pages within your own website for navigation, or you can use this
tag to link to external websites. The text between the opening and closing tags is what will be displayed for the link. To
specify the link, we use an attribute called "href". Attributes are properties about a tag. The "href" property is specifically
used for a tags, but other HTML tags can accept properties as well. Check the Mozilla documentation I linked
earlier for more information on that.
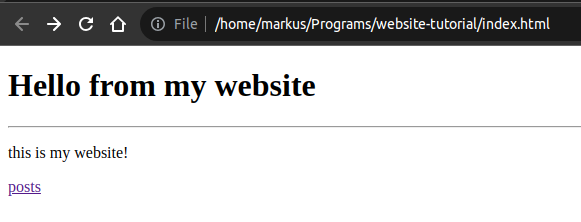
Make sure you've saved all the files (ctrl+shift+s or File > Save All). Then open your browser window where you were viewing the file on your computer. We haven't published these changes yet, so make sure you're on the browser tab were it has the path to the file on your computer in the URL bar. You should now see a link to "posts" on your index.html page.
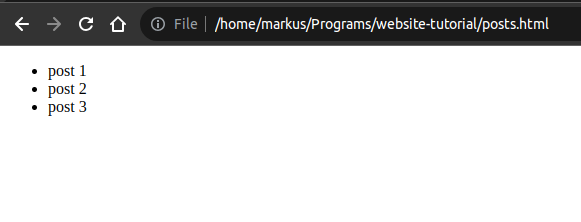
When you click the "posts" link, you will see our unordered list. Note that you can use the back button in the browser to get back to the index.html page.
Now to make these changes live so other can view them, we just need to push our changes up to GitHub. In the terminal in Visual Studio Code, run the following commands:
git add .git commit -m 'added posts page'git push
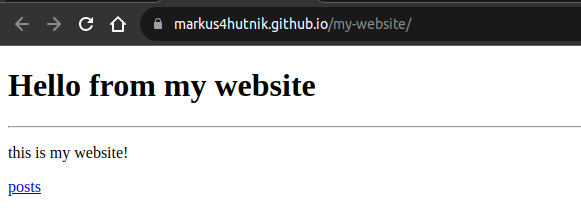
This will stage our changes, commit them with a meaningful commit message (added posts page), then push to our remote repository hosted on GitHub. Wait a couple of minutes for the changes to take effect. Then navigate to your website URL again to see the live changes (https://<your username>.github.io/<your repository name>).
Conclusion
At this point, you have a working website on the internet that you can share with people. Now you can start to customize it and add your own content. One thing to try is to make each post a link, and add an additional HTML file for each post just like we did for the posts page itself. To keep your files organized, you could also add a "posts" folder that contains all your posts. Then in the href attribute, you would put "posts/some_post.html". Ultimately, you now have the tools to experiment with various HTML tags and add whatever pages you want to your site.
Again, you can learn more about HTML and see what tags are available in the Mozilla docs.